Showing posts with label tim holtz. Show all posts

Saturday, 29 September 2018

Butterfly scrap card

Well I cannot believe it, another card made from my scraps box!

The butterfly is on painted card which I gesso'd over and used as a die cut butterfly a LONG time ago but I liked the left over piece-hence it was in my scraps box.
I attached it with my Tim Holtz tiny attacher as I love the fact that these staples go through so many different mediums and are easy to colour with permanent markers or alcohol inks

I matted and layered it onto a couple of pieces of scrap card and added a greeting and voila, another card for my collection!

At this rate I may see the light of day from my scrap box-or even the bottom of the box (doubtful to be honest)!

Happy crafting

kyla


Friday, 9 March 2018

Getting my Goth on!

This was the card I was making on Wednesday, I finished it.

The image was one I was passed (printed off) from a friend (I think it was Bex) which I coloured with promarkers and added a gentle glitter glaze on the flame.  The background was an embossing folder with TH distress ink in pumice stone gently brushed over the raised edges.

I then added some gems on the skulls eyes (well, why not!)

Gothtastic!

Kyla

Thursday, 5 October 2017

TH Birds


Just a quick update on my latest make.  Still on a challenge to use up stash I decided to use some of the stamped images I stamped from a previous WOYWW crop (waving to my 'enablers' Shaz and Helen if I remember correctly!!).


I stamped lots of images on plain card at the crop and later colour them in to use for a variety of different projects.

This project is unusual for me as it is quite a plain card and only one layer-but for me it works and I think it will be a good card for those occasions we all have where we struggle to find words for a friend but we want them to know we are thinking of them.

Kyla

Saturday, 15 April 2017

Speedy Recovery card

I needed to make a special card for some recently who had a nasty fall and broke her leg.
 
These embossed cards are quite large and I bought them from the charity table a couple of crops ago at the WOYWW meet up.  I have been mainly using them for weddings etc but I thought they would make a good base for this card.
 
I die cut some TH butterflies from board and coated them in some indigo blu flitter glue (love this tacky glue) and covered them with gilding flakes.


I stamped a sentiment and matted and layered it on silver card.
 
A feminine get well soon card and one perfect for the recipient.
 
Happy crafting
Kyla

Saturday, 19 November 2016

Scrap card


Just a quick update for a card I have made with some more scraps from my offcuts box.
I love Tim Holtz 12x12 papers.  
They are so thick and have some great detail and I really don't like to throw even the smallest scrap away (and I don't believe I am the only one who strokes the papers?  No?).
 
I have had a few thrown in my box for a while and couldn't think what to do with them.  Then suddenly inspiration strikes (odd how that happens, the offcuts sit there for AGES, like over a year and then suddenly, a spark of an idea!).

I mounted them on dark card and then doodled a border around the card and voila!

Now I just need to find something else to make with my ever increasing scrap box!

Kyla


Friday, 24 October 2014

365 Catch up

 I had gotten a bit behind taking part of the 365 Journal challenge over at The Kathryn Wheel blog so I thought I would roll August and September up in one blog post!


I chose nice bright sunny colours for August and used a sunburst stencil and my dylusions white spray to create a feeling of the warm sun rays.  I added a few beach balls just for the hell of it.
 

 For September I chose more autumnal colours as this is when we see the leaves just start to change from green through amber, red and eventually rust coloured.

I added leaves die cut from some leftover snippets to the bottom of the pages.
I find it hard to believe that we are coming to the end of the third year I have done this!

Kyla


Friday, 11 April 2014

A card fit for a film star

Hello peeps, finally it's the weekend!  Hurrah, it has been a long time coming this week!

For the past couple of weeks I have been run down with a chest infection, sore throat and cold-there is certainly a lot of it about at the moment, but I have the added problem that with RA I have a compromised immune system so things like this tend to hit me hard and takes a lot longer to recover-but its the weekend so a medicinal whiskey is in order!!

As I mentioned in an earlier post I have a stash of wall paper I need to use up so have set myself a challenge to make some cards from it.

Here is next one I made.


This was a wallpaper border of Marilyn Monroe which I matted and layered onto red and black card.

I added some Tim Holtz film strip across the top and bottom of the card and voila! Another card finsihed.

Happy Crafting

Kyla
 

Sunday, 23 March 2014

When two worlds collide

 Hello peeps, I hope the weekend is treating you well?

During the week I took advantage of a new railcard in the UK, the TwoTogether card.  Travel after 0930 or anytime at the weekend for the 2 people on the card is a third off.  We bought it primarily for our trips to London but then I thought...the stitch show is at the NEC...hmmm.

It was all a bit of a last minute rush, but after the totally awful last 15 months I have had I thought "sod it". Rather than go up on my own my lovely hubby suggested he come with me (bless him!). 
So, off on the train we went, and the saving with our new card paid for the card in one transaction!

These are a selection of the photos I took, its a little photo heavy so why not grab a coffee and settle back?


There was some lovely art material stalls...not as many as I would have liked but I still managed to get some goodies!

 This was one of the glazes and mediums on display.


Whilst I loved the hobbycraft bit, my love is really mixed media and textiles.  So many of the pieces on display were mind blowing-even hubby enjoyed this part!

 This was one piece for the background of the quilt and had photos transferred onto fabric appliqued over-really effective.

 I loved this rainforest quilt and spent quite a long time just standing there staring at this one!


 The dimensions on this piece were fabulous


 The detail and shading on this one was breathtaking


 These small hanging art quilts were SO inspiring.  I am currently making a VERY basic version of something like these at the moment!

Now, the NEC is a large place and 2 halls were taken up with Hobbycraft and Stitch, another was an education show and the other.....well that was a Comic and Collectable show!!

Look who was there!! 

 I met some Storm Troopers too!!!!

 Not often do my worlds of Sci-Fi and art mix.....but I loved it!

It was a knackering day and my poor little RA inflamed body took a battering, but it was worth it!

So, did I buy some stash?  Well, I was really restrained.....NO fabric or thread!!!!!  I know, I couldn't believe it either!

I did buy these though. 

 Some dye based watercolour paints that I plan on using on a wall hanging and 3 sets of small 1" by 1" TH distress inks-I thought these would be brilliant for my craft travel tote for when I go to my Coven meetings, crops or on holiday.

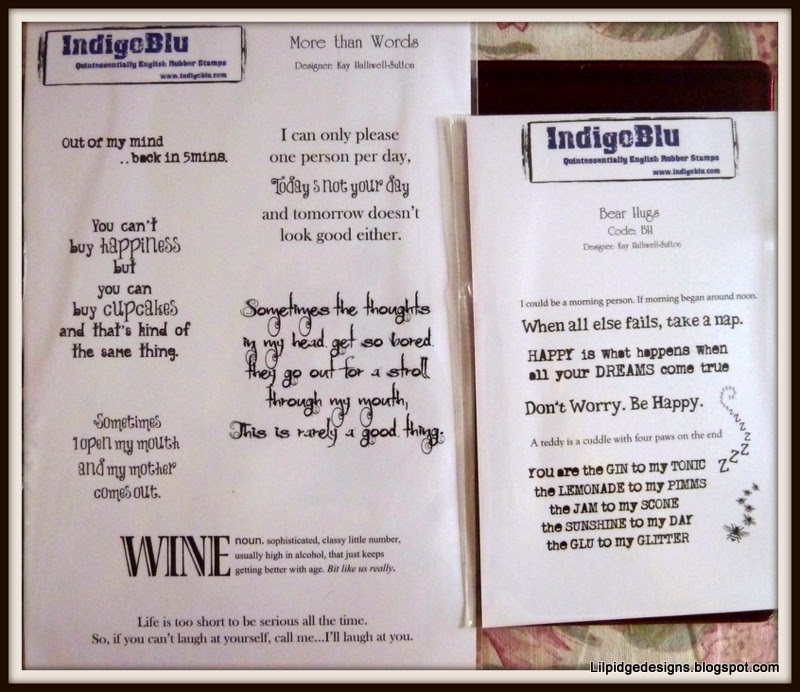
 Some Indigo Blue stamps (I love the quality of their stamps) and these phrases are brilliant

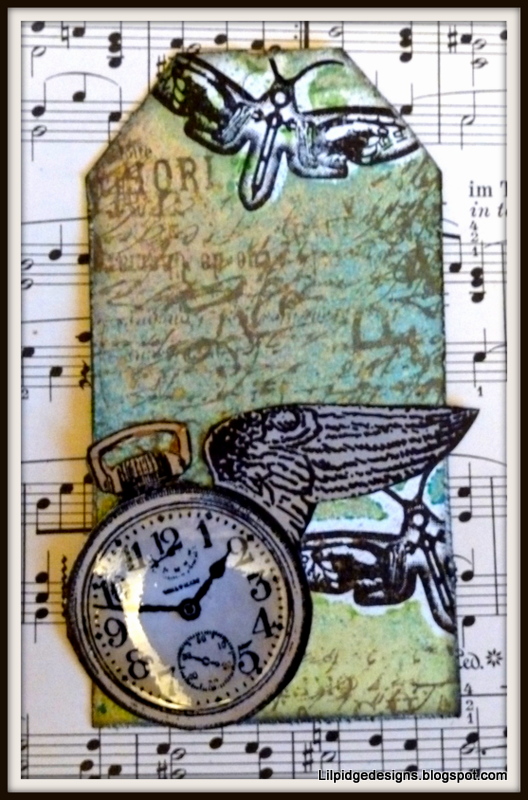
 Even though this stamp and stencil are not a pair I think they go together really well.

 I have never seen these rubbers and shields before, they were only £3.50 for the whole lot so I thought I would give them a go.


 In a nod to my Father and Grandfather (neither who are with us anymore) who both loved woodwork and creating things with their hands I bought this marquetry kit!  I have never had a go a this before, but I thought it looked a bit different and I can never say no to a new craft!  I will let you know how I get on!
 
 These moulds are for air drying clay.  I use a lot of hot glue and resin in my work so I thought I would give them a go....its not what they were intended for but I am hoping they have enough release agent built in to let them work with other mediums.
 

 I finally found these little stick on thimbles that I have been on the look out for for what seems like a couple of years!  I thought they would be really good for my little travel kit when I do a bit of handstitching, and a new blade for my poor blunt cutter! 
 Last, but in no ways least is my new book. I have all of Kim Thittichai's books and this is her new one not even in the shops yet but the shipment came in time for her stand at the show.

I love her work, its so experimental and really pushes some of the preconceived ideas of how stitching should be.


Phew, and there you have it.  Not tons of stuff to find a new home for but some fabulous goodies. 

Finally a big thankyou to my Nan over in New Zealand.  She kindly sent me some money for my birthday last month and believe it or not the above came to almost the same amount!!  Obviously meant to be.

Also, it is my Nan's 90th Birthday today and I had a lovely skype with her earlier.  I will blog what I made her once I am sure she has opened it!!

Now, I just need some more painkillers and some bed rest to repair my body (before I play with my new stash!).

Happy crafting
kyla


Friday, 21 February 2014

February 365 Challenge

Hello peeps, I hope you are having a fabulous weekend?

So, Friday night here started with a chinese takeaway (well, it is Friday...and its been a blooming long week!!) then hubby went out to a punk gig and left me all alone.....

So I decided some dedicated time in the craft room was called for...TV turned off, wine NOT poured and instead paints came out....and spray varnish!!  Well, all I can say is that the whole house now stinks!  I was amazed how much the varnish smelt, especially since I sprayed it outside the front door!!

After a bit of a play (sorry but I cannot show you what I made until the recipient get it!!) I thought it was time to catch up on the world of blogs....so after several watches of YouTube I finally remembered that I haven't updated my 365 challenge this month...so here it is:
My February pages in all their glory (complete with my new Tim Holtz stencil and my favourite Wendy Vecchi heart stamp).

You can catch up with all the 365 challenges here 

Right, its midnight and hubby has just got in so best explain the smell of varnish!

Happy Crafting
Kyla
 

Friday, 15 November 2013

Left over metal, ribbon and paper and viola!

Hello everyone I hope you are all well.  
Its getting really chilly here in the UK, proper scraping of the car windscreen time!!

When its chilly outside I don't feel as guilty about squirrelling myself away in my craft room (the smallest room in the house and therefore the warmest!!).

A friend is 50 in a couple of weeks so I thought I would make her a special card. 


The card is stamped in versamark to create the watermark effect and I used similar pieces from my scraps box (seriously...HOW does that box hold this much?!) to stamp the saying and mount it.  I used fabric dyes to dye a tag and then using my tiny attacher to staple some leftover ribbon (it was really thick ribbon, but only a couple of inches long, so I cut in half along the length so it fitted through the hole in the tag easier).  

Ferreting around in my box I also found a third of a metal tube (I know, I literally chuck everything in this box, leftover fabric scraps, off cuts of paper...basically anything too small to put away...but as we know a lot of us crafters are hoarders, so I CANNOT chuck out something that can be used again....those of you who know me from WOYWW crops will know I am the one who actually went through the bins on everyones desk...well, other peoples rubbish is SO much more interesting!!).

With this tube I flattened it out and dyed it with alcohol inks before die cutting leaves out of it.
There you have it, a card for next to nothing (shh...don't tell the recipient it was so cheap!!).

I am entering this in the playground at the snippets challenge here

Why don't you pop over and see some of the fabulous creations, all made using up some snippets-genius.

Happy crafting

Kyla

Saturday, 26 October 2013

A devil of a card

Hello peeps I hope you are well.  I have decided to make a few 'spookyish' cards and this is the first with the bombshell stamps.  I made a mask for the eyeball and stamped the flame over it and coloured it with promarkers.


I coloured some of TH tiny attachers with ink and used them to attach the layers.
My free photo editing software (Picasa) seems to be playing up and wont allow me to rotate pictures so I can only apologise if you are reading this in public and are now getting strange looks as you cock your head to the side to see the picture!!

I thought I would enter this into the Simon Says Challenge which can be found here 

If you are in the UK I hope the weather over the next 48 hrs treats you well....the storm has already hit here in the South West...wet and wild!
Happy crafting
kyla
 

Sunday, 20 October 2013

Creative Chemistry 102 Day 5

Hello peeps, well today is the last catchup day of my CC102.

As usual, I don't have many of the products (goodness knows how, since I have an entire room stuffed to the rafters full of craft stash!!) so I wasn't able to do all the techniques, but I did manage a few with 'different' supplies and some workarounds!


These are my favorite three techniques from left to right: faux rust, vintage shabby and tarnished silver.


The vintage rust was difficult to reconstruct but I did have some shabby shutters distress embossing powder to I mixed this with various different grades of other powders to create this rusted finish-I must admit I really liked how this one turned out.


The tarnished silver was similar to a technique I already use so it gave me an opportunity to develop this a bit more.

It was a great online course and has given me a host of new techniques and triggered my experimental mojo once again!

If you did the course, I hope you too enjoyed it and fingers crossed Tim and Mario do a CC103 soon!!!

Happy crafting
Kyla
 

Thursday, 17 October 2013

Creative Chemistry Day 4

 Hello once again-I thought I would blog my Day 4 of Tim Holtz Creative Chemistry class (it was last week but its taking me a week longer to complete as I am shattered after the surgery, and lets face it the whole point of an online class is the self pacing, right?


So, Day 4 is alcohol inks-now for a change I actually have several of these as I fell in love with them MANY years ago and I must admit I experimented back then with different techniques.  However, I have gotten a bit stuck in a rut and stopped experimenting so I was delighted with Tim's idea of alcohol inks and stencils!  Genius.


Yet another technique I will be using again, that's for sure.
Happy crafting

Kyla
 

Wednesday, 16 October 2013

Day 2 and 3 of Creative Chemistry 102

 Hello peeps, just a quick catch up with Tim Holtz Creative Chemistry 102 course.

As usual, I don't have many of the products but I have tried nearly all the techniques, some are mahoosive fails since I didn't have any similar products but others seemed to work quite well.


 The right hand tag was made with a homemade stencil cut from an image from the sunday papers!


On this tag you can hopefully see the depth I managed to get with embossing with a stencil (I really like this effect).

I do have some rock candy glitter so was able to do this technique (tag on the right) and I loved the 'smudge' technique on the left hand tag.  This gives a real muted retro feel to the tag and one I will definitely be using again.

Several people have mentioned to me that they don't have many Tim Holtz products so decided not to sign up for the course.  I would say if you have distress inks then a lot of the course you can experiment with your own paints etc.  Yes, the results may not be the same but once you have the knowledge you can experiment with other products and brands and see what results you get!

Either way, I have enjoyed the course and its pushed me to try new techniques with some old and forgotten products!

Happy crafting
Kyla
 

Thursday, 10 October 2013

Creative Chemistry 102

 Hello peeps.

So, after my ankle surgery (which I timed to coincide with Tim Holtz next Creative Chemistry class!!) I have finally managed to do a little crafting (not easy with keeping my ankle above hip height I can tell you....my craft room is now a hotchpotch of stools and cushions which I balance my leg on for about 15 mins at a time before I need to move around a bit....its testing my patience I can tell you!!)-but it is worth it as the course have been fabulous so far.

Now, the course started with Distress paints of which I owe none!  Tim says that its all about understanding the principles with these courses, so I decided to try different acrylic paints on his effects and see if they work.  I tried Anita's, Windsor and Newton and Rowney but the one that worked the best was Eco Green paints.  Now, they are not the same as distress paints so I had to pre mix them down with water, however, now I have learnt the techniques I have the knowledge to try and experiment and hopefully at some point I may get some distress paints.

 This card was made with the tag (I have another which I have printed out the instructions on and added to my Creative Chemistry 101 tags) demonstrating rusted metal. 


 I used the Eco Green paints again mixing the brown top layer in with Bronze Distress Stain and I really like the effect.  I added a metal cog I cut from a metal food tube and coloured with alcohol inks and a cog I made with my ever trusty hot glue gun (I SO love making mould and using hot glue to full them!!) and a rusty washer that I rusted myself with vinegar and cheap cola!!)


The marbled effect didn't really work with any of the acrylics I had (they still produced a nice effect I wouldn't have experimented with unless I was doing this course) but the tag above was the best with the Eco Green paints once again.

Finally I made a metal tag.  Now, once again I didn't have the metal, the embossing folder or the paint.  However, armed with the knowledge from Tim's instruction I decided to have a go using some metal tape from the tool box ( I think its what you bind round pipes?), black gesso and a different embossing folder.  I thought this would make a perfect background for my cyber man topper I made a couple of weeks ago from some resin!

So there you go.  Proof that you don't need to have all the products, but once you have the knowledge you can take it to the next level and start experimenting.  I know I will certainly be playing more with the oxidized metal technique on my first tag as this has lots of potential.

Right, time for my next lot of pain killers and another ice pack around ,my ankle!!  Happy crafting

Kyla


Friday, 16 August 2013

Bargain Mix Media books and inspiration stikes

 Hello peeps.  I hope you have all been keeping well?
Last weekend I had a free weekend (which is rare) and in Bristol we have a book shop where all the books are £2 each! Well imagine my surprise when hubby found a box of American mixed media books hidden under one of the tables!

Now, lets be honest I could have bought most, if not all of them....but I decided to show restraint (yes I did!) and bought these 2 fabulous books-what a bargain.

I haven't had time to browse them properly (I am saving that for my next ultra long bubble bath!!) but it did inspire me to mess up the Room of Shame (odd.....every time I type that I hear it spoken in a deep booming voice!!) and have a go.

This card has a patterned background, toned down slightly with some corduroy DI.  The tag is Dylusions and DI with some water flicked over then some script over stamped with pink DI.

The heart was a piece of watercolour paper which I added ephemera to then scraped acrylic paints over with an old store card and then wiped some gesso over to mute the tones a little.

I then die cut it, stitched round it and added it to the tag with some more stitching and ribbon.

The best part?  I cleared up the Room of Shame (ooh, there's that voice again!!) straight after so its still tidy!

Right, I think I need to have a lie down after all that tidying!

Happy Crafting
Kyla
 

Thursday, 28 March 2013

A quick and almost free card!

 Hello peeps...are you ready for Easter? Time off work and choccys on standby??

So, time off work can only mean one thing for me...crafting time!!  Woo hoo!
I was busy today round a friends house making a new skirt (yep sewing!!....I will blog that later in the weekend when I have some photos) and am waiting on the varnish to dry on a painting, whilst I wait for that I thought I would blog a Marilyn Monroe card I recently made.

 The picture is actually from some wallpaper border samples that cost me nothing from a local DIY store (yep, I liberated stuff to be upcycled and crafted with....me?  who'd have thought that!).


I added some Tim Holtz film strip and used my TH Tiny Attacher to adhere it (I SO love my tiny attacher and use it on so many different projects).

So, a very cheap card and took only a few minutes to make....bargain!

Happy Easter and happy crafting

Kyla


Tuesday, 19 March 2013

A different take on a wedding card

Spring Equinox  tomorrow and snow forecast!!

Looking back over my blog posts I noticed I haven't posted the card I made for my brother's wedding.  He and Zoe were married in Ecuador a few weeks ago (where they live).

I used some TH papers and made a patchwork out of them, toning them down with a wash of gesso.  I then added an ATC I made (with the TH die I won when I was lucky enough to go to the TH paperarsty event a couple of years ago) and added a moth paperartsy die and stamp, some torn corrugated cardboard and a pen nib for the moths body

I added the word 'journey' to represent the journey they are starting with their new life.
I wish them every happiness in their new life together

Happy crafting

Kyla


Sunday, 17 February 2013

A wedding, various Birthdays and soldering!

Afternoon all, I have not been about for a while, work is far too busy and it was my birthday last week so my hubby took me to London for a few days away.  It was lovely (we had about 2 inches of snow!!), I watched a Japanese tea ceremony, Chinese new year in chinatown and spent far too much money and time in the 3 story art shop CASS Art in Inslington (I love it there, the staff are so knowledgeable). When I got home the crafty coven made me a cake and bought LOTS of crafty goodies!!!!  Thanks ladies x

As well as my birthday, last week was also several friends birthdays, my brothers birthday, his wedding (in Ecuador where he lives) and his wife's (ooh that sounds odd, good, but odd!!) birthday too!!!  What a week!

I did at least manage to make my hubby a Valentines card.


As he is in  a band I added some music paper and since it was from me I added some stitching.

I also had a go at making a flashing LED heart for him!!  My solder technique isn't great (my first time!!)...but I think he appreciated the effort that went into it!


Right, as its sunny outside I am off to clear the dead leaves from the guttering round the garage...oh what a glamorous life I lead eh?!

Happy Crafting

Kyla

Sunday, 6 January 2013

Stencil tutorial with moths

 Hello, I hope you are having a fabulous weekend.

I thought I would post a tutorial (tried videoing it but after 2 hrs awaiting for youtube to upload only 3% of it I gave up and assumed that I have done it wrong! So am using photos instead).

I had some left over thin plastic sheeting I got from the scrap store (left over recycled industrial waste-no idea what its original purpose was) and decided to have a go at making my own stencils.


 I cut a few moths (I must admit, I prefer moths to butterflies....much more mysterious) with my big shot  and my paper artsy moth die.


I made sure I had them flying in different directions

 I then used the positive and negatives of the stencils and coloured them with my dylusion sprays and a touch of heirloom gold perfect pearls spray


 I over stamped with my Tim Holtz script stamp and adirondack pesto ink pad


 I peeled the moth stencils off (cleaned them...well, wiped them on the apron...and set them aside so they can be used again) and with archival ink I added the paper artsy moth stamp


 I roughed up the edges with my ever present Tim Holtz scissors


Used the masking technique to add some wings to a clock face

Then attached the clock and added a layer of glossy accents for the glass like finish


I also made an ATC using the left over stenciled paper and my TH ATC die, adding some a typed word, some torn and distressed cardboard from my recycling bin and I cut out one of the moths from my TH paper stash


I admit I am a big fan of stencils and I will definitely have a go at making them again, maybe even a free hand cut one?

If you have a go at making your own, I would love to hear how you got on.

I am entering the ATC into the http://funwithatcs.blogspot.co.at/2013/01/challenge-78-something-new.html

Happy crafting

Kyla